Bullet Resistant Panel Installation
ArmorCore® Bullet Resistant Fiberglass Panels are the preferred choice for private, commercial, and government security. From safe rooms to court rooms, ArmorCore® panels will ensure top level protection where you need it most.
ArmorCore® panels are installed behind the decorative finish, they can be incorporated into any interior design. That’s one of the many reasons why people turn to our non-ricocheting products. And because our panels are non-ricocheting, they are the preferred product for public spaces.
ArmorCore® panel installations are very easy as general contractors can easily incorporate the panels into your structure. No specialized experience is required. Please view our installation video on our website to see how simple it is. Below you will find detailed installation guides and diagrams to help you through the process.
Take a moment to familiarize yourself with the guide. If you need any more information about using ArmorCore® in your construction project, contact a sales associate at 1 (866) 688-3088.
ArmorCore® Installation Instructions
The following recommendations are designed to assist in the installation of ArmorCore® bullet resistant fiberglass panels, as well as to preserve the ballistic protection of the panels.
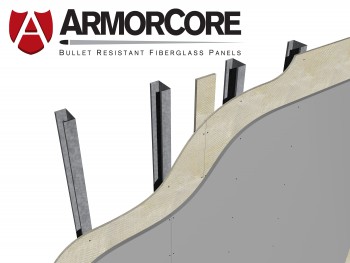
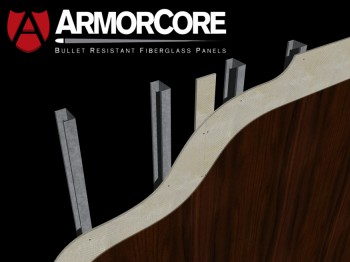
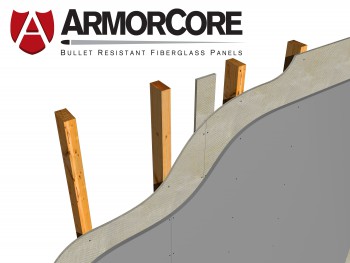
ArmorCore® Wall Diagram
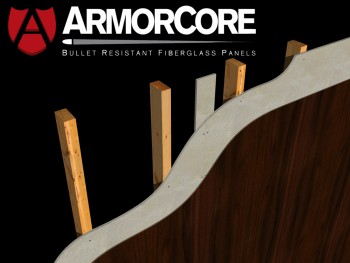
ArmorCore® panels can be installed on a variety of different walls. Depending on your project, they can be affixed to either a wooden frame or steel beams. The panels can then either be covered with drywall or woodwork. They can easily be adjusted to match your project. Custom cuts can be ordered directly from the factory or the panels can be cut onsite.
Below you will see several diagrams outlining the composition of a new wall. To get the full protection of ArmorCore®, which includes extreme weather conditions, the bullet resistant panels must be affixed to the outside of the frame, and then covered with the finished layer. If bullets are your only concern, the panels can be attached to either side.
Armorcore® can also provide batten strips to fortify seams where two panels are installed side-by-side without support of a stud. The batten strips provide the same UL level of protection at the seam as the installed panels.
ArmorCore® Installation Videos
Wall Installation Instructions
Video provides a comprehensive view of ArmorCore UL 752 Listed bullet resistant fiberglass. Production capabilities of Waco Composites and ballistic testing are included. The focus of this video is installation recommendations to create bullet resistant protection. A home safe room is featured in this video, but universal instructions for ‘armoring’ are included. DVD copies of this video are available upon request.
Instalación de ArmorCore
Este video proporciona visión integral del producto de ArmorCore UL 752. fibra de vidrio resistente de bala. Se incluyen las capacidades de producción de la compañia Waco Composites y tambien las pruebas balisticas. El objetivo de este vídeo es para recomendar el proceso de instalación y crear una protección a pruebas contra balas. Un cuarto seguro de hogar se ofrece en este video pero las instrucciones universales ‘a prueba de balas’ bienen incluidas. Copias de este video están disponibles en DVD.
Frequently Asked Questions
Do bullet resistant panels require a certified installer?
There is no certifying agency for the installation of bullet resistant panels and they are commonly installed by contractors with no previous experience with this kind of product. If necessary, local installers may be available upon request.
Which way should bullet resistant fiberglass face and which side of the wall?
Bullet resistant fiberglass panels are installed perpendicular to the threat and either of the 2 sides of the panel may be used as the ballistic strike face. Panels are also universal in that they can be mounted to either side of the stud wall or fixture.
Is it better to install ArmorCore vertically or horizontally?
Regarding the ballistic protection, ArmorCore can be installed either way, but installing vertically is advantageous for the placement of the batten strips.
What are Batten Strips?
Batten Strips are 4” strips of the same UL Listed Level of material. They are sold separately or can be cut out of panels on site. Battens are not intended as stand-alone items, but as backing material of the same UL Listed Level to provide protection at any joint between two panels.
Which Side of the panel should Batten Strips be installed?
Regarding ballistic protection, batten strips may be installed on the either side of the panels from the threat direction.
Should Battens be installed at the studs?
We recommend installing the ArmorCore panels so that the butt joints fall between the studs instead of breaking on the stud. This allows for the batten strip to be installed on the backside of the panels in the stud cavity and prevents having to furr out the wall. Battens can be fastened directly to the panels.
Are Batten Strips required at horizontal joints?
Yes. Wood studs might be notched to allow for the horizontal batten strips or the batten strips may be cut to fit from one steel stud to the inside of the next.
What screw pattern should I use?
The screw pattern for ArmorCore panels and batten strips depends on the weight of the panel and will need to be determined by a structural engineer for the site. Waco Composites cannot dictate a screw pattern. The shear strength of ArmorCore is very strong, so it should hold a screw very well. It is advantageous to only use enough fasteners to hold the panels to the studs, then do a complete screw pattern when installing the drywall through both materials.
What gauge stud should be used?
We do not recommend or specify a specific gauge stud to support ArmorCore panels. This should not hinder the ballistic performance of the product. Most of the weight of the ArmorCore panels should be transferred to the floor as the bottom of the installed panels touch the slab.
Any suggestions for a thin gauge stud that the screw is not “biting” into well?
If steel studs are light enough to not provide enough “bite” for the screws, then one trick is to rip 2x4s in half and line the 2”x2” wood pieces inside the stud.

